Today, we're going to get a little more into the nuts-and-bolts and talk about Mining Structures and Mining Models. A Mining Structure is basically a table. It has some data that you would like to do analysis on. The first step to any analysis is deciding what type of question you want to ask. Once you've decided the question, then you can pick your data source by creating a Mining Structure. Now that you have a structure, you can create as many models as you need to answer your question. Each model should be built to attempt to answer the question in a slightly different way. For instance, if you want to predict whether a customer will buy a bike, you could create a Decision Tree Model and a Naive Bayes Model. Then, you could compare the two models to see which one gives you the best results.
Up to now, we've been using the built-in algorithms to do our analysis. There's nothing wrong with this. But, it requires to create a new mining structure each time we want to run an analysis. We can look at each of these structures using the Manage Models tool.
 |
| Manage Models |
Let's see what we have.
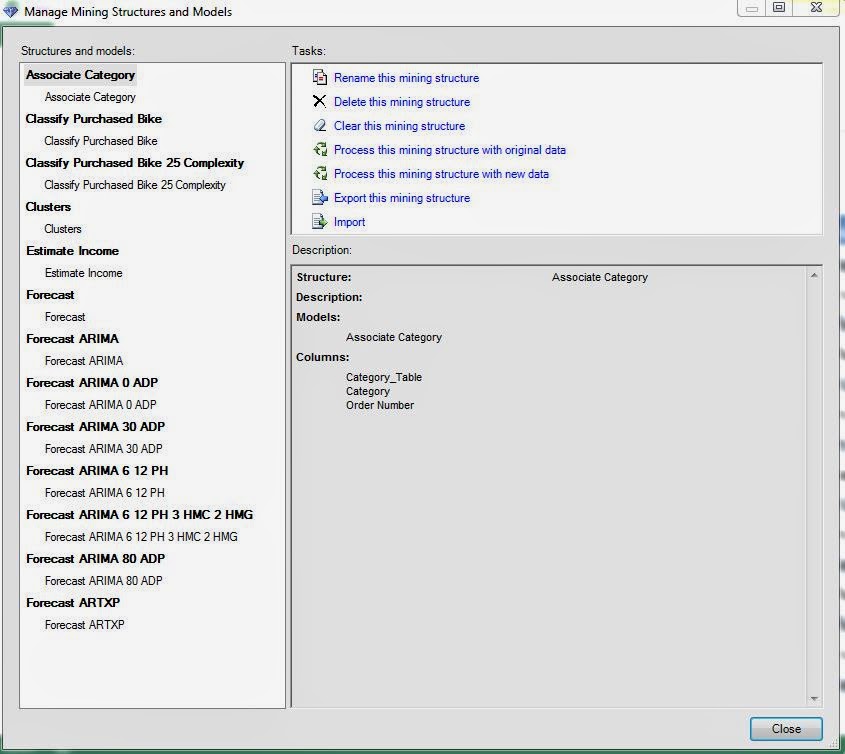 |
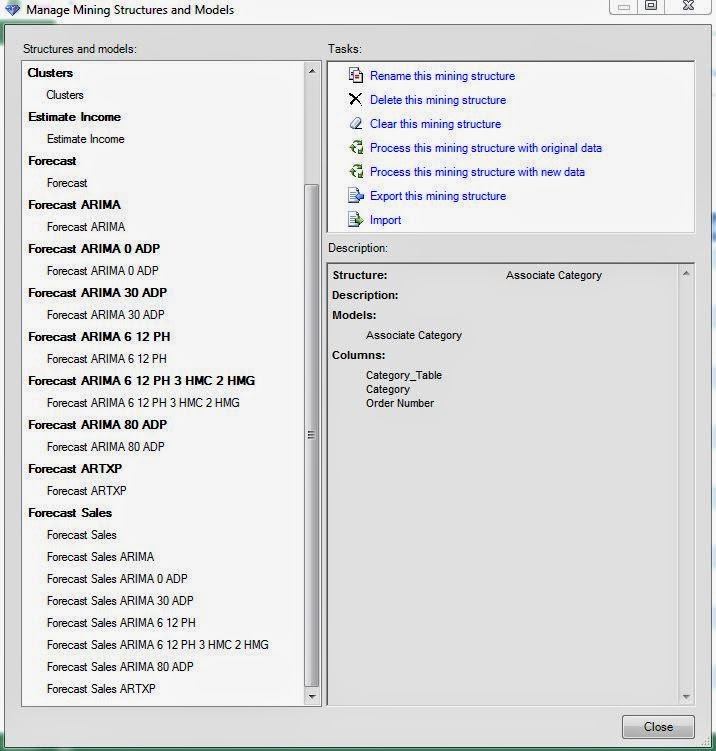
| Mining Structures and Models |
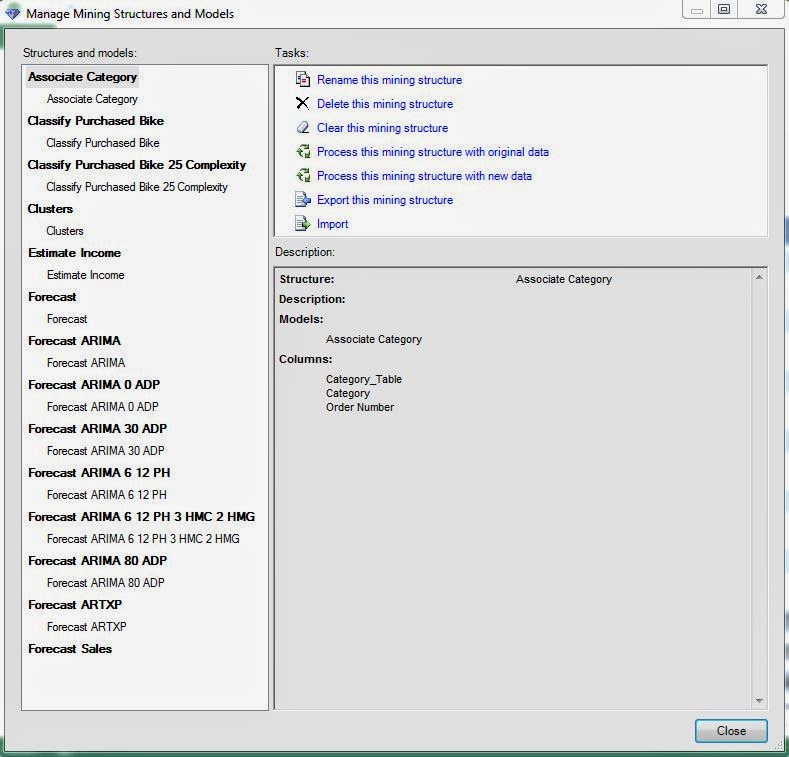
Here, we have all of the Mining Structures and Mining Models we've created so far in this blog series. However, we don't need this many structures. All of the Forecasting Models use the same data to answer the same question. They could have easily been placed inside a single "Forecast" Structure for organizational purposes. The question becomes "How do we make these Structures and Models?"
 |
| Advanced |
As a simple demonstration, let's take all of our Forecasting Models and put them under a single "Forecast Sales" Structure. First, we need to create a Mining Structure with the data we would like to use for Forecasting.
 |
| Select Data Source |
Of course, the first step is to select the source of the data. We'll be using the Monthly Sales table we used in the previous Forecasting posts. Let's move on.
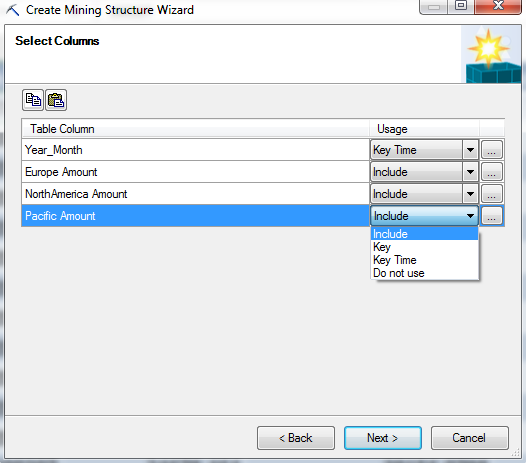 |
| Select Columns |
Here, we have to select which columns from the table we would like to use. For each column, we have four options. We could include the column, which allows it to be as a predictor and regressor in the models. We could make the column a key, which means that it is a unique identifier for each row. We could the column a key time, which is the same as a key, just for Forecasting purposes. Lastly, we could choose to exclude the column entirely which would mean that we cannot use it in any of the models within this structure. Also, if we click on the "..." beside any of the values, we can choose the data type and content type for that column.
 |
| Data Type |
The data type of a column determines how algorithms deal with it. For instance, a Text column is treated as a dimension or slicer, which is great for building decision trees. A Boolean (true/false) is also great as a slicer. Long (integer) and Double (decimal) are numeric values that can be used in almost any way you would like. Lastly, you can choose Date which is also numeric. This means that they can be ordered and sliced. However, Dates cannot be used as part of an arithmetic model, such as linear regression, because you can't simply perform arithmetic between dates and numbers.
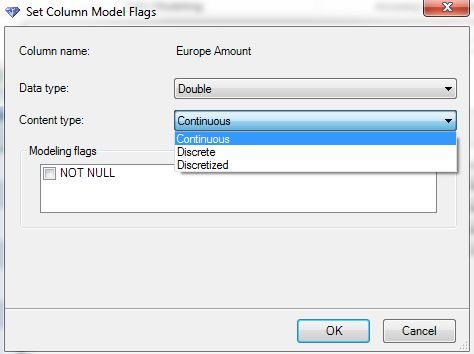 |
| Content Types |
A content type defines the way that a column is used. A Continuous variable is treated just like a regular number. You can add them, subtract them, etc. A discrete variable is used a slicer, such as Region = "Pacific". The final data type is a little more complex. Let's say you have a numeric variable that you would like to use a slicer, e.g. Age. If you set it as discrete, it would treat each as a completely separate category. This would lead to a LOT of possible values. A general rule of thumb is that you don't want a discrete variable to have more than around six possible values. So, if you set Age as Discretized, you could create "buckets" for Age. This would effectively create another column that takes values such as "20-29", "30-39", etc. You don't have to worry about creating these buckets yourself either. The Data Mining tools have a built-in algorithm for discretizing data in an optimal way. Lastly, you can set a column as NOT NULL. This means that you will get an error if there is any null or blank value in that column. Let's move on.
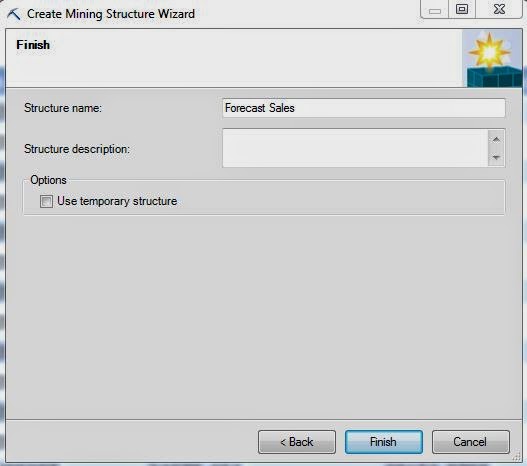 |
| Create Structure |
The final step is to give the Structure a name and create it.
.JPG) |
| Manage Models (Empty Structure) |
Now, we can see our empty Mining Structure at the bottom of the list. Let's add the Forecast model to this structure using the "Add Model to Structure" button under the Advanced tool.
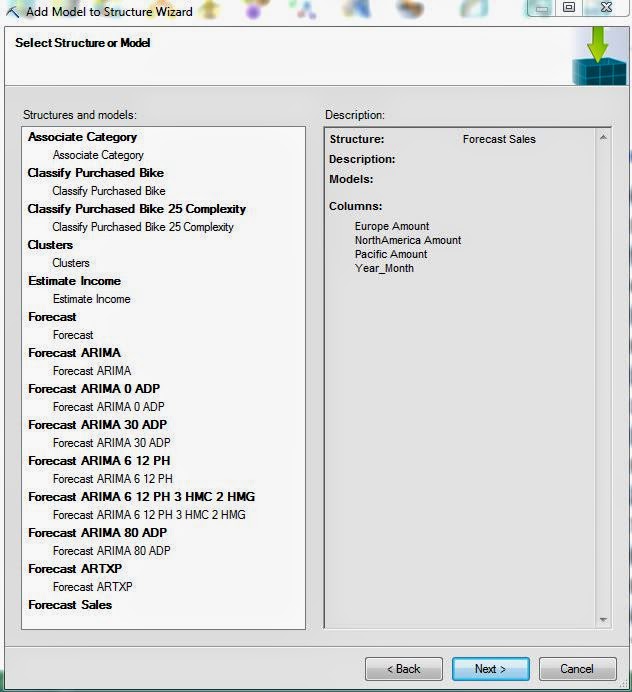 |
| Select Structure |
Since we've already stored our data within a Structure, the first step to this analysis is to select that structure.
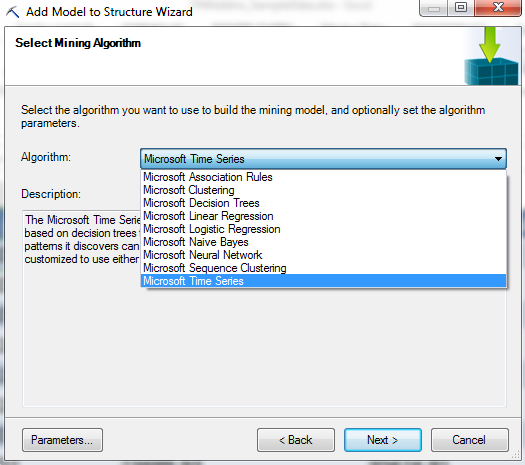 |
| Select Algorithm |
Then, we need to select the algorithm that we would like to use. There are a few algorithms in this list that we haven't seen yet. The only way to access "Logistic Regression", "Naive Bayes", "Neural Network", and "Sequence Clustering" within Excel is with this method. However, the first three algorithms are actually just different methods for doing analyses we've already done. We'll touch on them in later posts. Sequence Clustering is something we haven't talked about yet. Unfortunately, we won't be covering Sequence Clustering in this series. However, you are more than welcome to tinker with it on your own. Back on topic, we don't need any parameters for the "Forecast" model because this was the basic model. We'll use parameters for the rest of the models. Let's keep going.
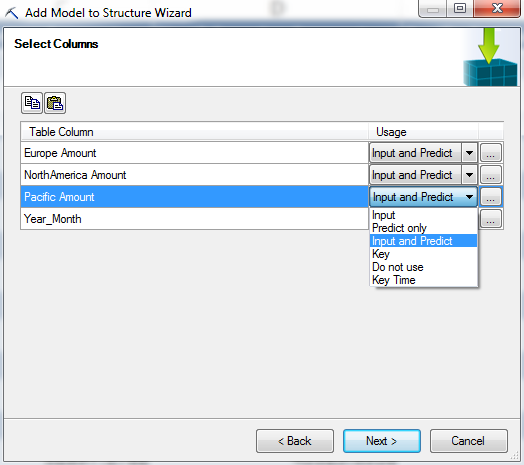 |
| Select Columns for Algorithm |
This window looks like the same window we used when we were creating the structure. However, our options are different now. For one, we can't change the usage for Year_Month at all. For our model variables, we have a few options. As you probably remember, the ARTXP model allows each series to be used to predict values for the others series as well as itself. That means that each series is both an "Input" (used for predictions) and a "Predict" (predictions). Let's say you don't want to predict values for Pacific, but you would still like that series to be used to predict values for North America. In order to do that, all you have do is set Pacific to "Input". You can also choose not to use a column at all if you wish. Also, if we clicked on the "..." again, we would see that we no longer have the option of changing these data types. Let's move on.
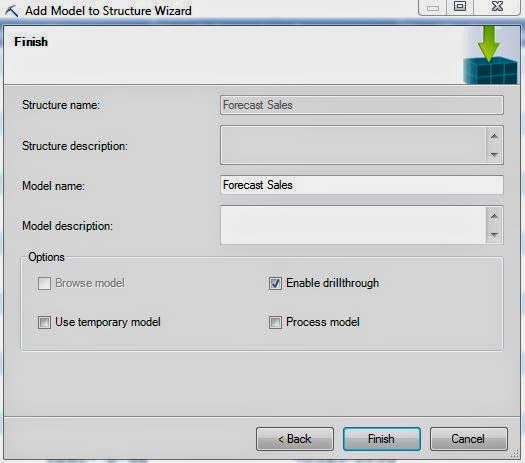 |
| Create Model |
Finally, we get to create our Mining Model. There's another option here that we haven't seen yet, "Process Model". Processing the model would allow us to use it immediately for our analysis. Since we're only interested in moving the models into the structure for now, there's no reason to process the model. We can always come back and process the model later.
Now, all we have to do is repeat this process for the rest of the models and we'll have moved all of models into a single structure.
.JPG) |
| Manage Models (Complete Structure) |
Now that we're getting further along in this series, we hope that a lot of the pieces are starting to come together. The Data Mining Add-in for Excel is extremely powerful and we hope that you'll find a use for it in your business. Keep an eye out for our next post where we'll be talking about Logistic Regression. Thanks for reading. We hope you found this informative.
Brad Llewellyn
Director, Consumer Sciences
Consumer Orbit
llewellyn.wb@gmail.com
http://www.linkedin.com/in/bradllewellyn
No comments:
Post a Comment